
Photoshop
In Photoshop I learned about Tools + Technics such as:
Mask
Quick selection tool
Brush tool
Duplicate layer
Color Range
Hue/ Saturation
Color Balance
Brightness/Contrast
Black & White
Curves and many more.


I created a image of a bear and lion hybrid by duplicating the layers, masking out different parts of the images and using colour adjustment to make the colours similar
The Quick selection tool was used to select and mask out the eyes,nose of the lion and the body of the bear.
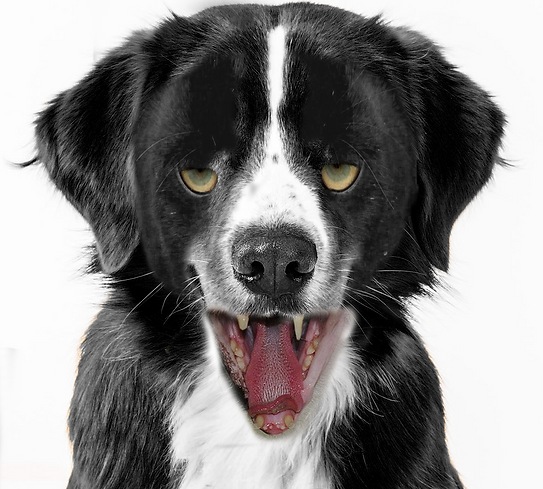

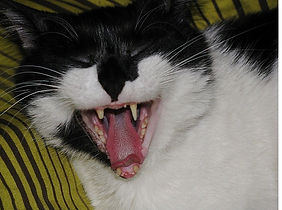
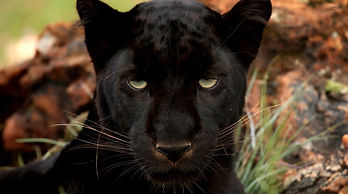
Quick Selection tool was used to select the eyes of the Black panther and the month of the cat in order to mask them and adding them to a dog with the Brush tool.
The dogs body was also selected so I could add the Black & White.
Maya
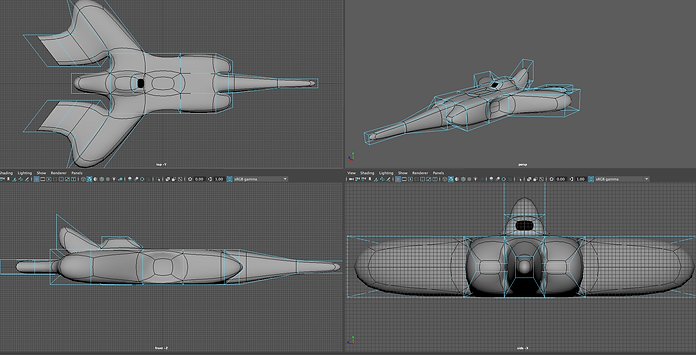
I made use of the tools and techniques that I learned to create a big rectangle, inserting different edge loops to divide it and extruding the faces in order to shape it into a space ship.
Tools used:
Move tool(W)
Rotate tool(E)
Scale tool(R)
Extrude(Ctrl + E)
Mesh Tool


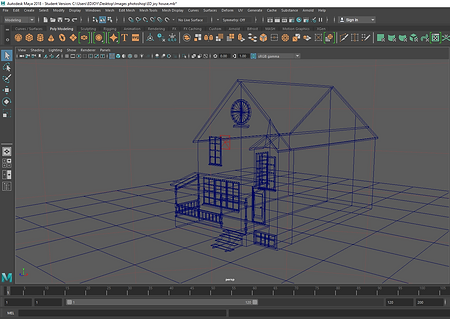
By following tutorials I was able to create a house and old TV.
I learned about new tools and techniques and I also added my own touches to the creations.
.png)
.png)
.png)
.png)
.png)

Other examples


James Bond Gadgets
This Bond gadget was created in Maya
A kettle was created then transformed into a Bond Gadget
The first step was to Set Project to make sure everything was organized and autosaved
After that, a new folder was created somewhere accessible (File + Project Window) – by pressing new, naming the file, adding location and accept

(Create + Poly Primitives + interactive creation); doing so will allow more control over the Polygons.

Different ways of creating the kettle were tried and the result wasn’t as expected, so an image was used as reference. That made the process easier because it’s harder to create from your head than by reference.


This image was used as reference
(Body + Base + Cover)
(Polygon Sphere + Select Face + Shift-Left Click + Extrude).
That was done to extrude the selected faces of the Polygon Sphere, the base and cover.
The faces were later deleted, and another Polygon Sphere was divided into a half and the other half was deleted, then – (Right Click + Edge Tool + Select Edge + Mesh + Fill Whole) to create the cover.
For the base, the Scale Tool was used on a Poly Cylinder to adjust it to the right size and shape.

Similar techniques were used to create most of the gadget
Two Polygons were put together, the one that that was supposed to remain was selected first (Mesh + Boolean + Difference), then the poly that was selected first remained and the other disappeared leaving behind a whole with their shape.

Vertex was used to adjust the points of the cube that were turned into a rectangle (Scale Tool) to create pieces of the helicopter.


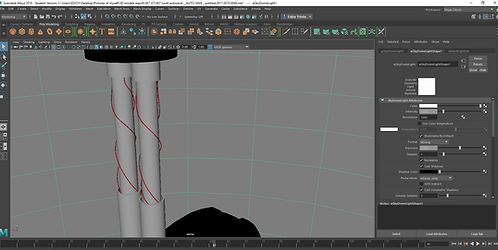
To create this wire, CV Curve Tool was used to draw a straight line that was later adjusted around parts of the helicopter and a small Poly Cylinder was created; the line was near the cylinder, pointing to the middle of the button. After that the cylinder button face and the line were selected, Extrude Option was set to 100 and then the cylinder extruded following the lines position.


Different point of view made everything easier


After selecting the chosen object, the right click was used to open the option to assign a new material.
(Left Click + Assign New Material + Arnold Shader + aiStandardSurface)
Presets were used to choose the right material then the colors were changed.

An HDR was downloaded, then inserted into the Skydome light, after that shadows and light were added to give the environment more life.

Shadow - (Create a floor+ expand it using the scale tool + insert new material + aiShadowMatte)
.png)
After everything was done, different frames were rendered, and the images were saved and uploaded.


