top of page
The Composite
Introduction to Nuke and Compositing

In this session, I learned about Nuke. A powerful software used for high-level compositing. There are different sections in Nuke such as Viewer, Properties Bin and Node Graph.
Some shortcuts are used to make the workflow faster. I also learned about Colour Correcting, Dynamic Range, and how to save a project. It is important to have everything organized in the Node Graph. I completed an exercise that required me to connect the nodes properly to get the right composition.
Rotoscope
In this session, I learned about the history of Rotoscope and what it can be used for. I have done some exercising by using tools to create tracking effect. I learned how to properly set a project, import files, re-saving a project when little changes were made. Preset is the session used to get your project setting the way you want.

Complex Roto

In this session, I learn about more Complex Roto. Complex Roto is done when there are various elements in one shot. To achieve an accurate movement is important to use shapes in different areas of the subject instead of just tracing around it and the right amount of points and keys.
Basic Keying
Basic keying
In the first part of the lecture we looked at Keying Garbage mattes, Lumminance Key, Chroma key and how nuke is a software that gives you total control to manipulate every aspect of the scene , than software such as After Effects. It seems like there are extra steps to achieve your goal, but at the same time you will know what goes in your project. When an image is imported, the viewer combines the Red, Green and Blue channels to display a colour image, because the read not brings the image raw.
Images include and transparency layer(Alpha Channel). The Alpha Channel is not automatically applied. To do so a Premult node is used to multiply the RGB layers by the Alpha layer.
Keying is a way to select parts of the image you want to remove. It can be used in a scene with fine details, shapes or multiple characters. Roto and keying are usually used together to get a clean matte with the assistance of garbage mattes.
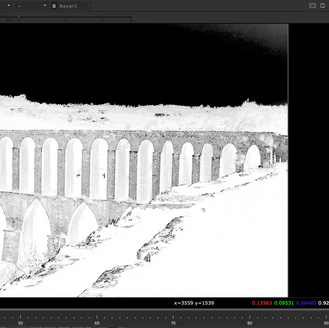
Luminance key (Luma key) is used to remove parts of an image using the brightness to select what needs to be removed.

I used the luminance key , Blur, base key , merge key , copy, premult and lightwrapt to achieve the final result in the video. The combination of keying and roto made for a good matte.
Advance keying
There are important things one needs to think about when filming with Greenscreen. Softwares such as Vector scope and Waveform scope are used to make sure the Greenscreen is evenly lit and not under or over exposed. Screens should be lit separated from the main focus. Making sure everything is how it should before filming will make it easier for the keying process. The nodes used for keying are, keylight, keymix, merge node, denoise, lightwarp, Despill and Additive key.

Additive key was used to bring, details of the hair that was lost.

In this task we keyed with different types of greens. Firsly the Denoise node was used to reduce the noise in the image, keylight, copy node, blure keymix and roto to keep keep fine details of the hair and cloths.
Greenscreen exercise
Tracking
In this session I learned about tracking in Nuke. We looked at the tracking interface, features and nodes such as roto, tracker and copy , that are used to crate different types of tracking.


In this exercise I added the tracker not and added a tracking from my chosen hero frame for better performance.


In this exercise I used the tracker node and roto to track more than one point.


Roto , Tracker, Grade and absolute baked were the nodes used to a planar tracker.
Colour and Grading
Today I learned how different color can help tell an effective story. Colors are usually used to create depth, separation and mood.


Grain and Noise
In this section I learned more about compositing and the problems you have to solve to get a good composition.
Compositing is combining different images or footage together and making it look like it was all shot with the same camera at the same time.
When things are combined to be composite they don't often match. The job of the compositor is to match colours, lights, tones, noise and more to blend the footage.
Noise is ‘The individual particles of silver halide in a piece of film that capture an image when exposed to light'. Bright ares will have more noise than darker areas. To correct the noise the RGB, Red, Blue and Green channels noise needs to be matching . Noise sometimes needs to be added to 3D objects.
Complex Cleanup
In this session I did some complex cleanup to remove people and objects from the scenes. The footage were tracked and the and then I added a Rotopaint and used the clone tool to scan a clean area and replace the people or objects. The size of the clove tool had to be changed for certain areas and I tried to scan various parts of the scene to make the paint more natural. Nodes such as Freeze node, copy roto, premult, grade, bluer and merge were usedimprove the scenes.


In this scenes all of the nodes were used to do a similar job. The transform node was used here together with roto to move certain parts of the water.
Advance Cleanup
In this session I remove the logo on the box and added a shadow back into the footage. I mostly used the rotopaint node, roto, copy , holdframe, premult, grade and merge. The process was mainly tracking the scene, using the clone tool to remove the logo but making sure that the initial shape of the box was preserved, that had to be done on my hero frame and I had to make sure it was frozen , and making sure that I adjusted gama, lift and multiply.


Recap
Today I did a summary of what we have been learning through this semester. We used the knowledge and skills we learned in Nuke to complete exercises. In the first exercise I need to remove a logo and place another in the same place and on the second I had to remove the background and everything else of the scene and add a simple color.


First I found a hero frame, then used the roto node(O) to roto around the logo so I could track that specific session of the video, after that I converted it to ConerPin2D(relative, baked). A frame hold(Tab+ Framehold) was added to my hero frame and then a rotopaint (P) was used to clean out the logo. A copy node (C) was added to pass the information from the B string to the A string, connect to a new roto, used to create an alpha around the logo area. A premult(Tab + premult was added to view the area where the logo was and a merge(M) to connect the original image to premult.
After playing it back you could see that the logo was not moving according to the video so I added the ConerPin2D(relative, baked) and making sure the animation was copied (from) and then set to no animation to everything. To place the other logo I just used a image and merged it to the first ,merge I created and the resize, added a corner pin (allowed me to manipulate corners of the image), transform (to move it), luma (match brightness), saturation ( to fade the color) and defocus (to take away sharpness). The tracking information was also added to match the video.


After the key lights were added and adjusted I used a tracker to track the points I wanted the held my hero frame and painted the points out with roto paint.


Tracked the points you see in the image and the used the average track to create a single track.
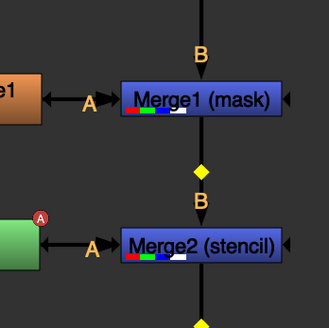
Changing the merge from over to mask.


bottom of page


