top of page
Environmental FX
Week 1
BULLET RIGID BODIES
Introduction to the Bullet plugin.
Setting up the scene.
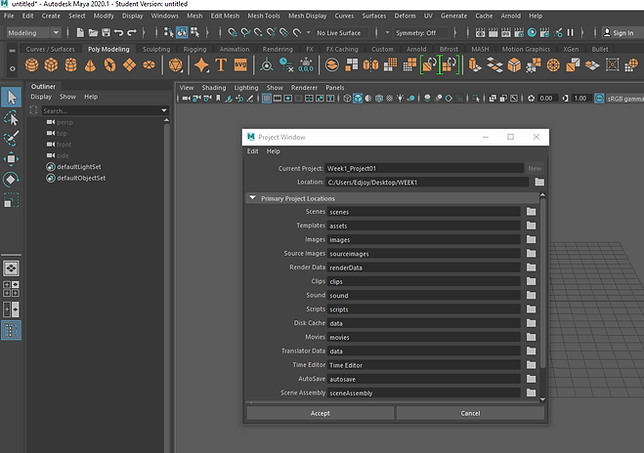
Creating project and selecting it's location.

Creating a new scene and changing the playback end to 200.

Setting the project.

Making sure play every frame is selected.


This are examples of how Maya measures things in relation to the real world.


Here I created a simple domino.
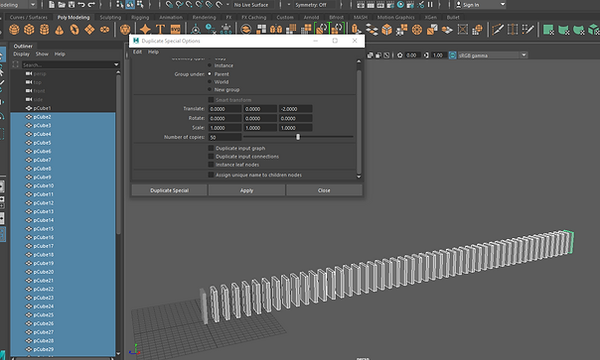
Duplicated the domino by using duplicate special( Added a number and direction.


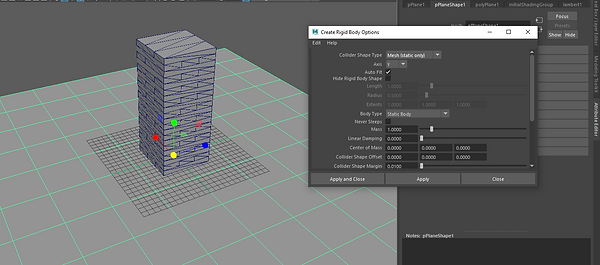
Selected all the dominoes and added a active rigid body.
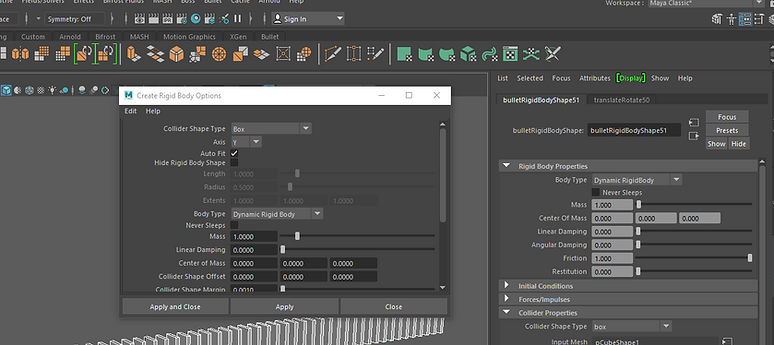
Only changed the collider shape margin to 0.1.

Added a plane mesh and used it as a ground.

By selecting the plane and adding passive rigid body to it allowed for an interaction between the floor and dominoes to happen ( body type was left on static and collider shape changed to mesh).
Before anything was added to the floor the domino was going right through it.

Changed the z initial velocity to -2.
The first domino moved and created a short domino effect. But it needed more force to move like it would in real life.
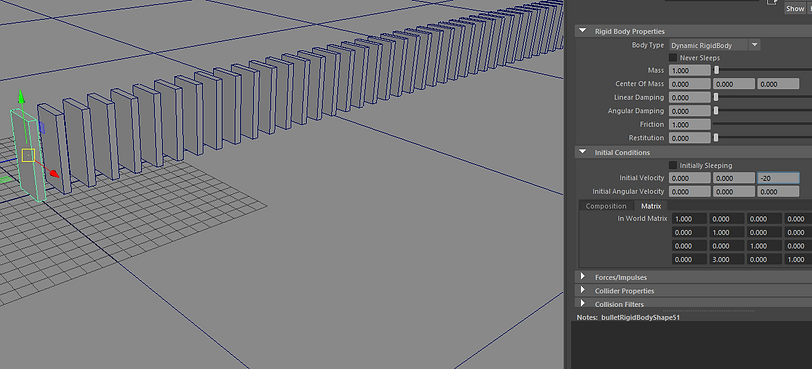

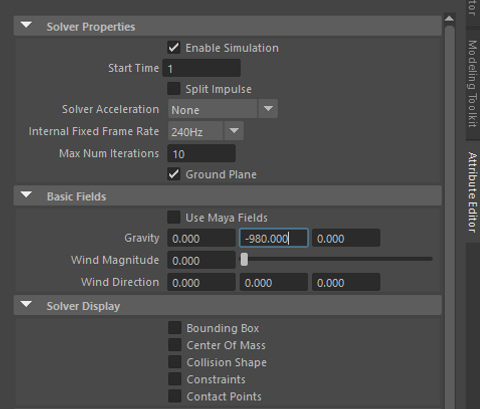
I added more velocity, timed the Y gravity with a bigger number to get more gravy, then put the frame rate higher.
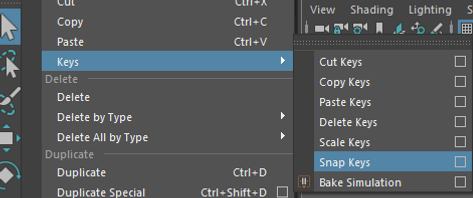
The images show how I baked the animation.


Result
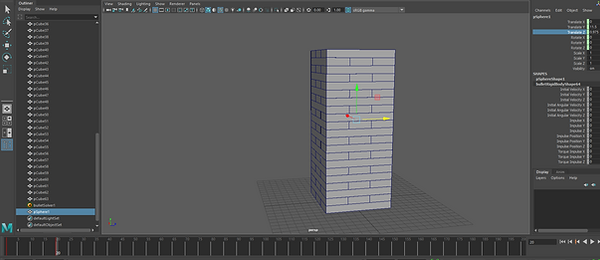
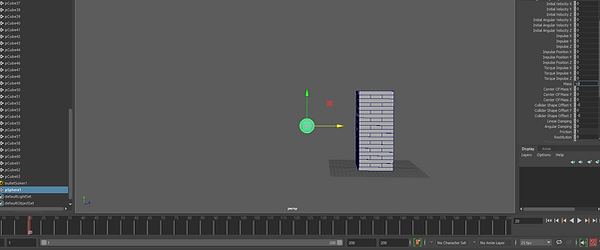
JENGA
Using bullet to knockout a Jenga.

Created a cube and changed the width and depth.
I then duplicated the mesh position it properly and grouped it so I could do a duplicate special.

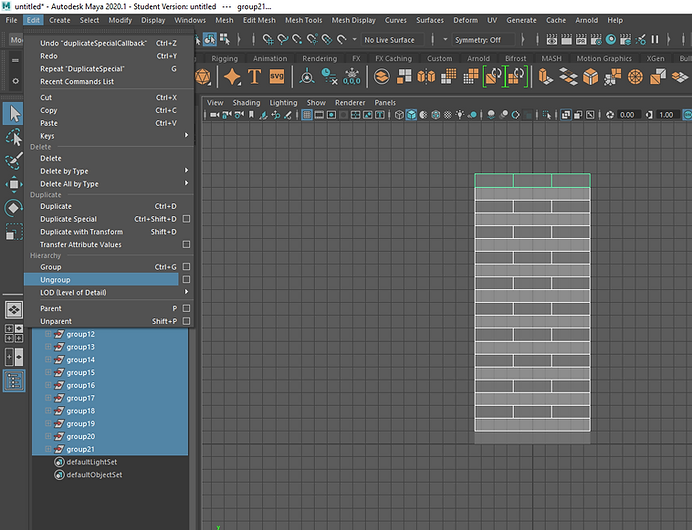
After that I ungrouped everything.

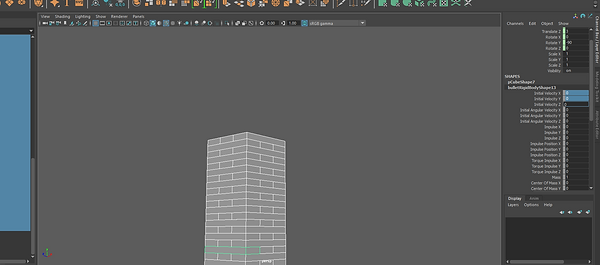
Here I selected and added a bullet rigid body and changed the collider margin.


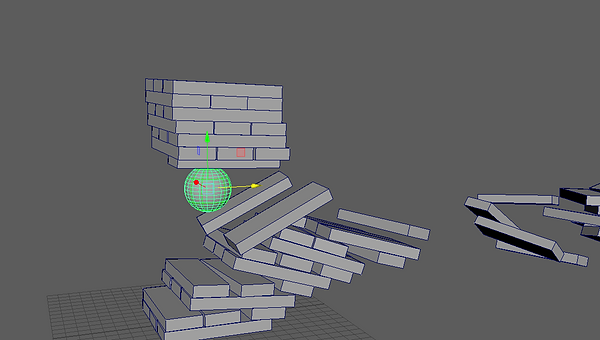
Played it and I could see that they were going down, so I selected the ground plane to stop that from happening.


I then changed the X and Z initial velocity of some mesh's.
Result
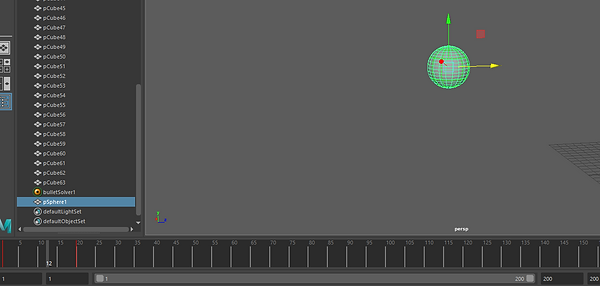
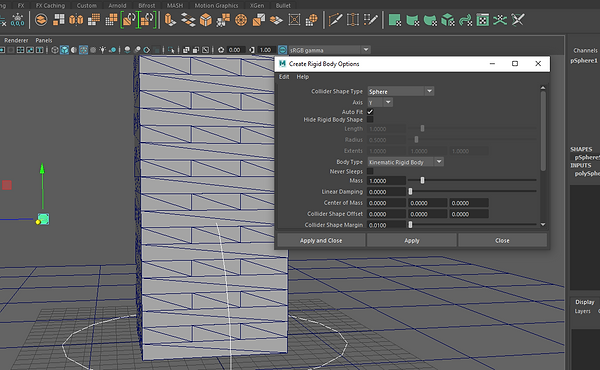
The initial velocity was set to 0.

A sphere was created then a kinematic rigid body was added to it and shape type was set to sphere.
I then animated the ball so it could hit the other objects.
The only problem was that after the impact the ball stayed static.

Here I keyed body on kinematics rigidbody on frame 20 and changed to dynamic in frame 21 so the ball did not stay static.

I put the mass up to 10 then 100 to see the affect it would have once there was an impact.

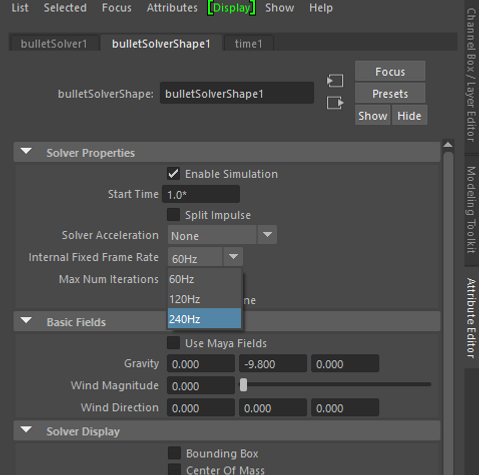
I changed the frame rate on the bullet to make the simulation better.

I put the Y gravity up to start fixing the scale.

The ball would get halfway and everything would fall without any contact.

I then went to the first frame and selected the ball so I could delete the keys from the selected object.
The ball stayed static but the cubes still moved.

By turning on initially sleeping the cubes would not move until there was and impact.


Here I removed bullet from selected because it was effected once I removed my key.

A rigid body kinematics was added again.

I then select translates keyed and moved the frame to 40 so it could automatically key.


Here I removed the bullet from the cubes.
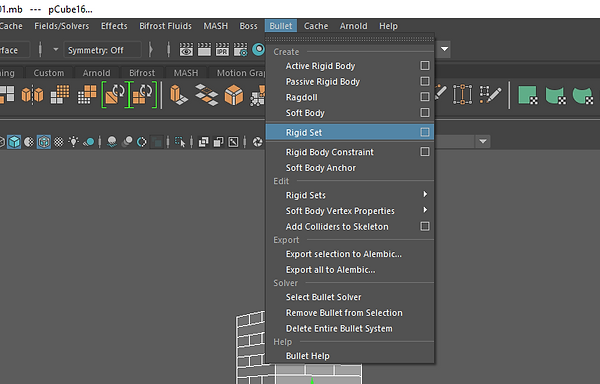
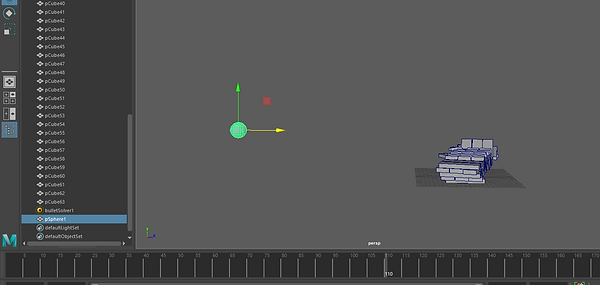
I added a rigid set to it.
I then created a plane and added a static body with shape type of static mesh.

I put the gravity up so it so the pressure created by the cubes were contained.

Under the outliner I turned the shapes on .

Under bullet rigid initial state I turned the initially sleeping on.

I then create a small sphere.
Added a kinematic rigid body to it.

Positioned it where I wanted and keyed the translates.

Played around with rigid attributes and changed the restitution to 0

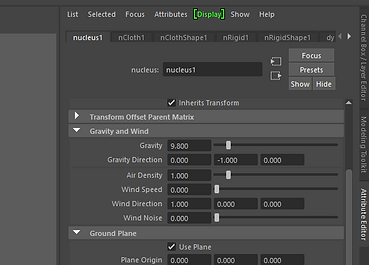
Changed the gravity back to -98

After creating the first animation I move 1 frame then changed the position of the sphere and moved a few frames to key the sphere connecting with the cubes again.

I played with the animation a little bit.
Result

I selected the bullet rigid set and selected export all to alembic to bake everything.


I selected UV write, write color sets and named and exported it.

I deselect enable simulation hid the bullet and bullet set then imported the alembic.

BREAKING GLASS
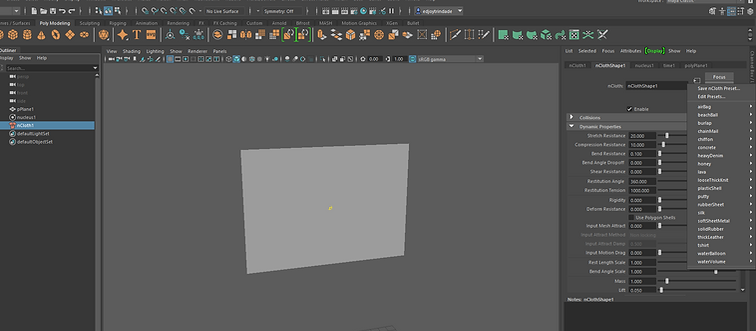
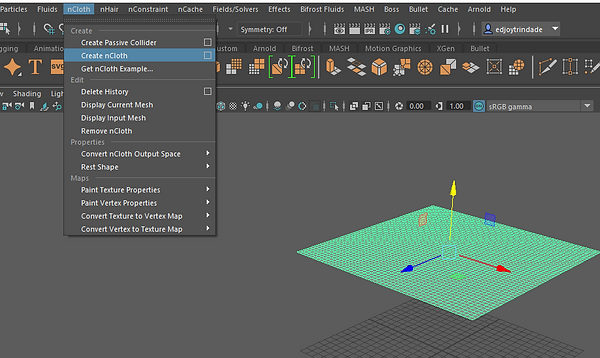
NCLOTH SET UP

I created a plane changed the height width and add some subdivision to it.
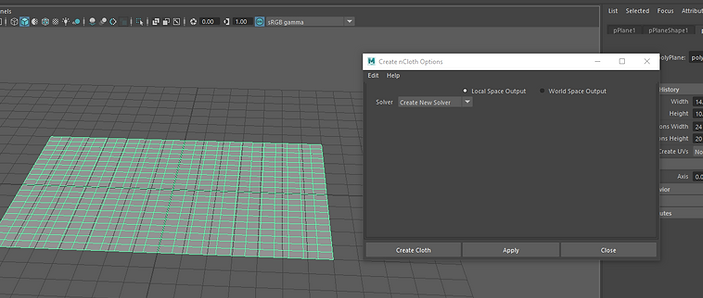
Selected the plane and used the create cloth options to create a cloth.

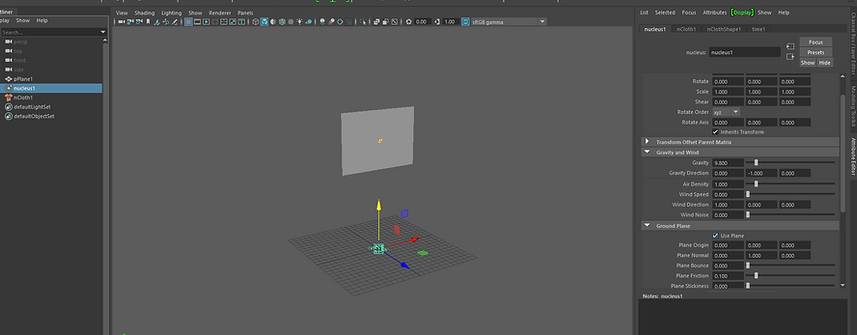
At first when you play the animation the cloth just keeps going down.
With nucleus selected I tick the use plane box to keep the cloth from going down

I then put the cloth up and rotate it
Played with the presets to get different effects when the cloth touches the ground.

The more sub division it has the more it will fold.
CREATING FLAG
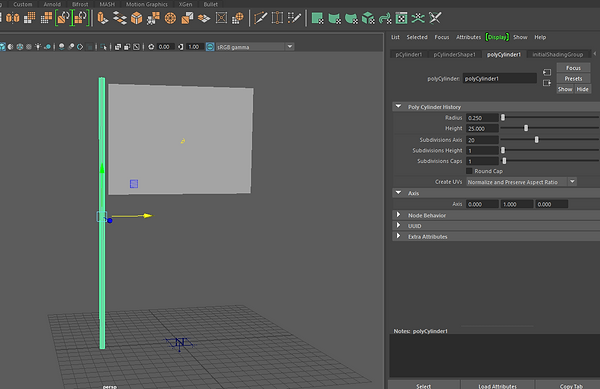
I created a cylinder and changed the size and division.
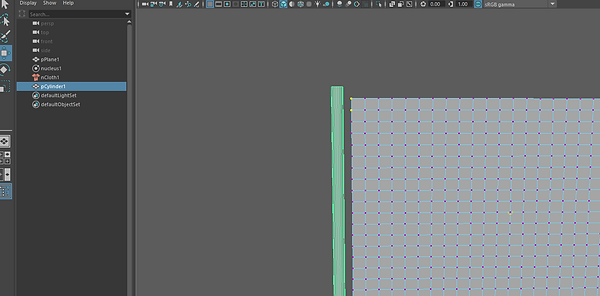
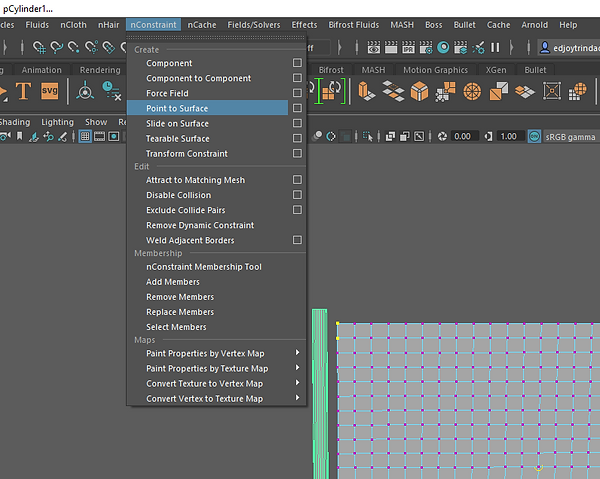
Used the first two vertex from top and bottom with the cylinder selected to added the points to the surface.


The flag stayed attached to the pole.


Under nucleus I put the wind speed up.
First Result
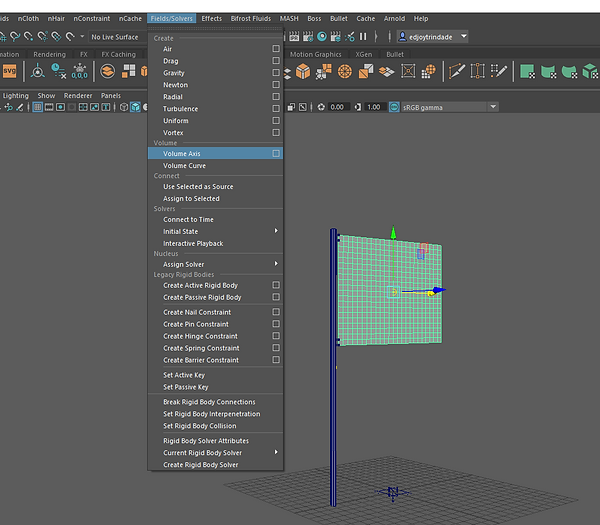

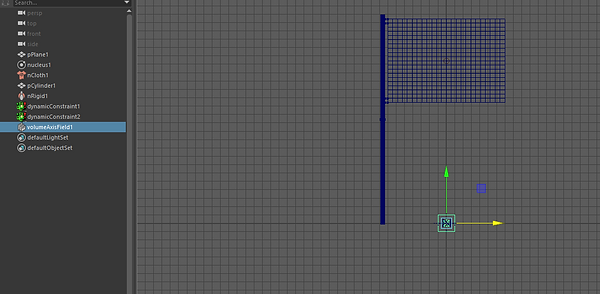
I added a volume axis to have more control over the cloth.

Here I changed the position of the volume axis, made it bigger and added some speed for testing.

I forgot to create a passive collider to the pole so the flag would not go through it.


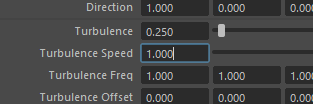
I played around with the direction, speed, turbulence, and turbulence speed and freq. To get the desired effect.

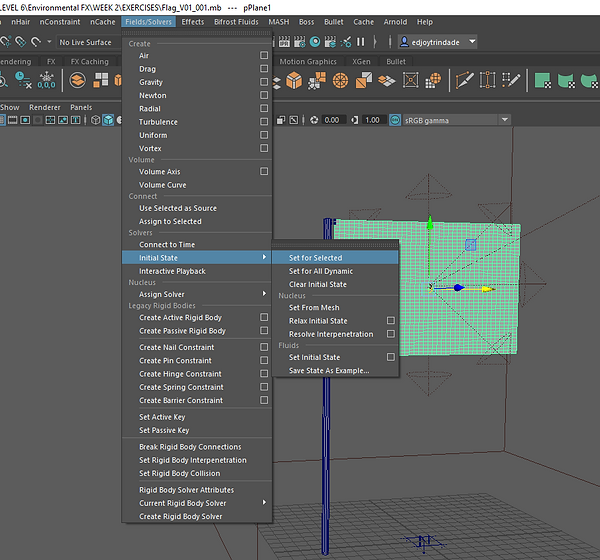
Here I choose a frame and set the initial state to get that information .
NCLOTH Skirt

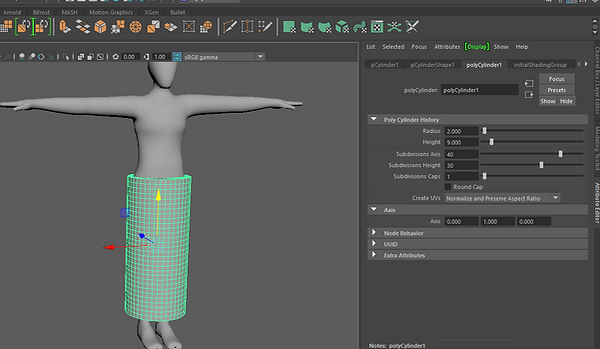
I used a cylinder to create a skirt shape.
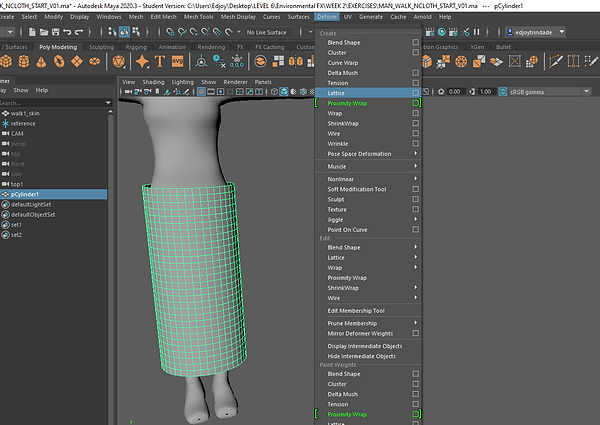
Added a lattice to it so I could control the shape of the skirt.

This is the setting that was used.
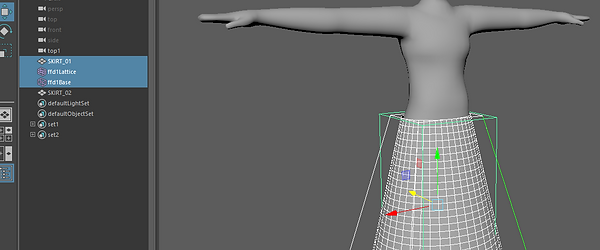
After adjusting the skirt I named it, duplicated it and grouped the lattice with the first skirt.

Deleted the history of the skirt.
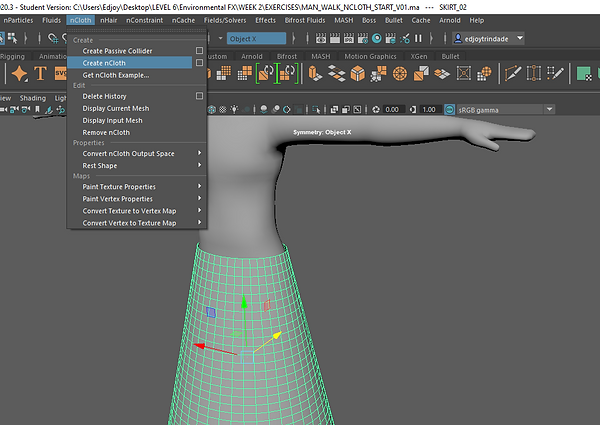
Added a ncloth to the skirt.
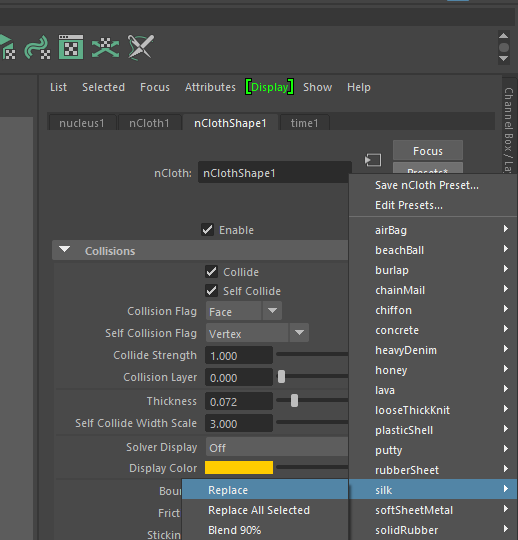
Then used the silk preset.

Selected the points then the mesh and added a point to surface.

And changed the constraint method to wield.

This was the result.

I enable collide so the skirt would not go through the mesh.


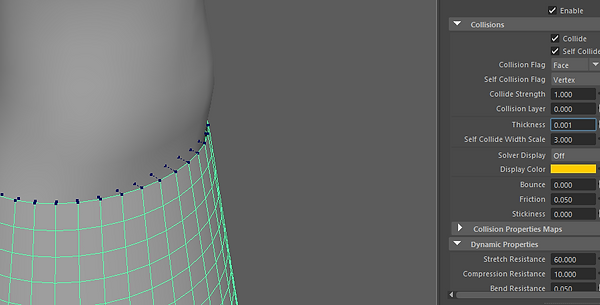
I played with the thickness of the rigid shape and the cloth.

Because the skirt would still go a little inside of the mesh on top, I changed the constrain method to spring.
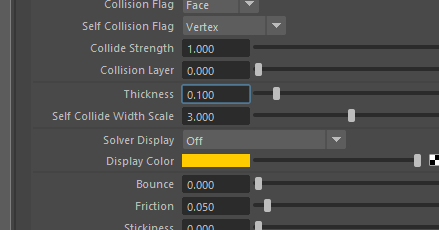
Put the thickness of the cloth up.


Put the scale of the nucleus down. When the space scale was at 1 the cloth would only start folding when there was an interaction but when it was down it behaved more like a real skirt.
NCLOTH TEAR
Created a plane and a frame.
Added nCloth to the plane.

Selected the points then the frame and added point surface to it.
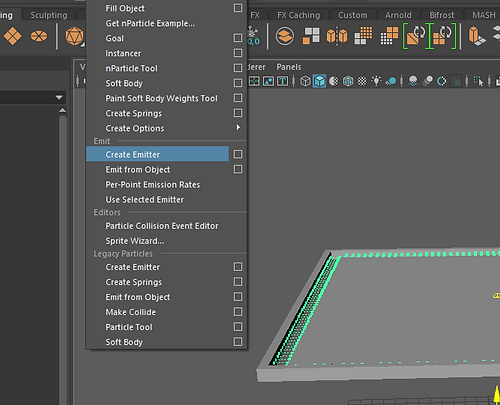
Added a particles emiter.
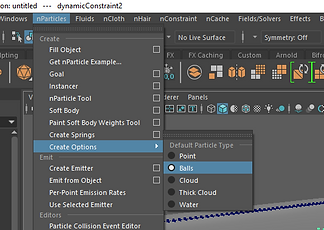
Made sure the balls option was selected.

Added a chiffon preset to the plane.

Made the ball a bit bigger.

Adjusted the cloths resistance.

Put the mass up for the particles.

Selected some vertex.

Added tearable surface to it.

Selected the plane and the strength under tearable constrain.
Result
NCLOTH PRESSURE
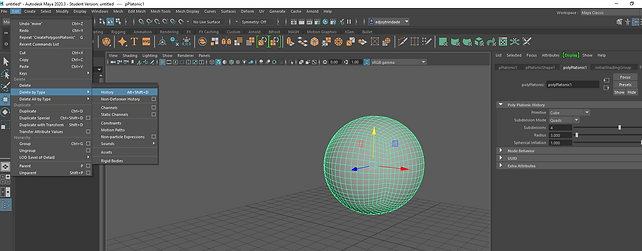
I created a sphere by using a platonic solid.

Added a nCloth to it.
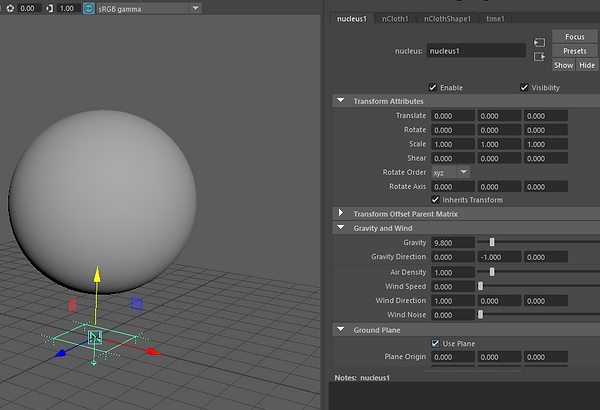
Selected use plane.
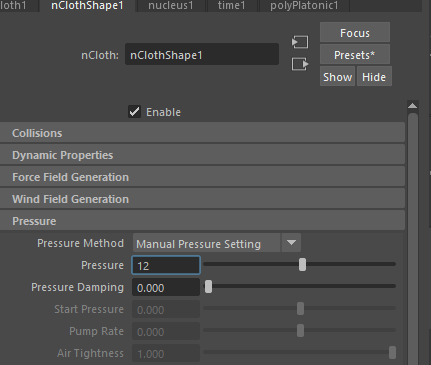
Added some pressure to the cloth.
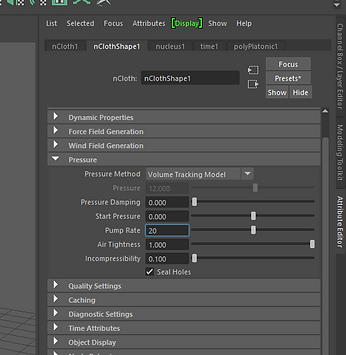
Changed from manual to volume tracking model and put the rate up and incompressibility down.

Result
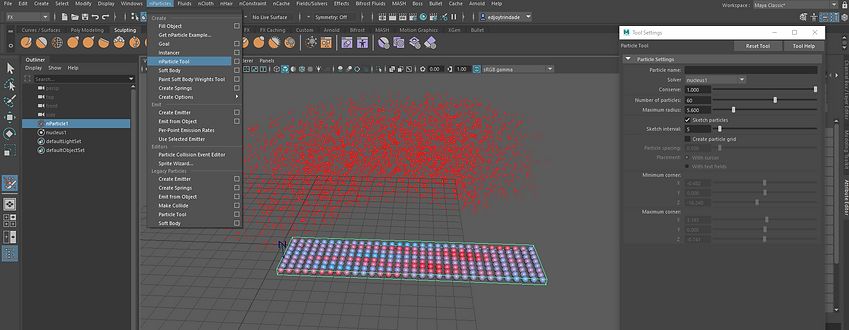
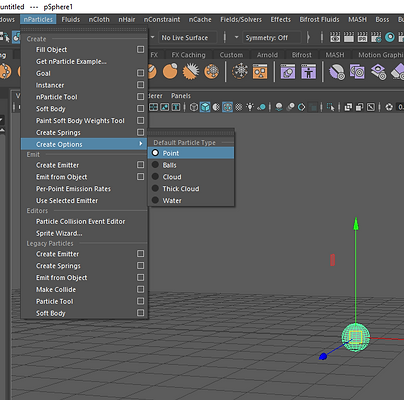
NPARTICLES CREATION TYPES

After You choose the default particle to create from, you then click on create emitter.

Select use plane under nucleus to make sure the particle does not go beyond the plane.

Default particles.
NPARTS FILL OBJECTS

Choose the default.

With the cube selected I click on particle fill option and applied it.

The same method did not work for the glass because of the space in between.

Had to activate double walled.

A passive collider has to be added to the mesh so the particle does not go through.
NPARTS TOOL
Here I looked at different ways the nparticle tool could be used to generate particles.
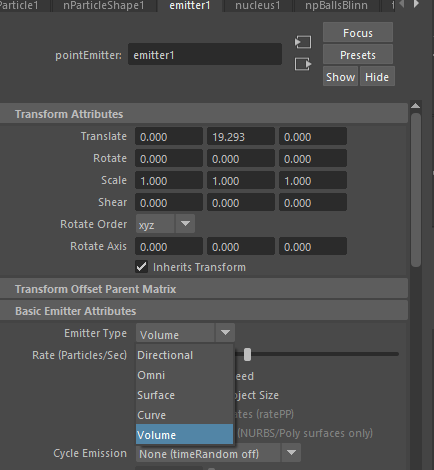
NPART EMITTER

I created a emitter.
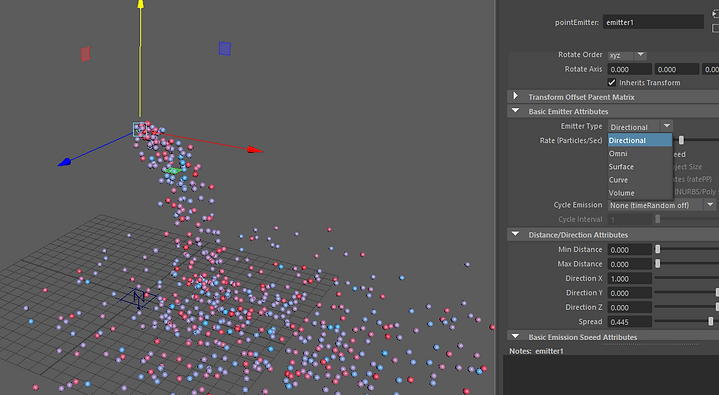
Played with some a attributes for different effects.

To have a little understanding of what some functions are used for.

Here I used emit from object to emit particles for the sphere.


I played with the attributes and under the nparticle shape I selected ignore solver gravity.
The particles emitted without falling.

I created a curve and added emit from object to it.
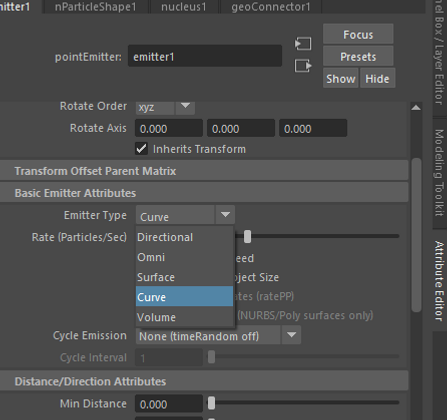
The particles emitter type was changed to curve so the particles could emit from the whole curve not just the dots.
NPART PER POINT EMISSION

I selected the plane and added emit from object
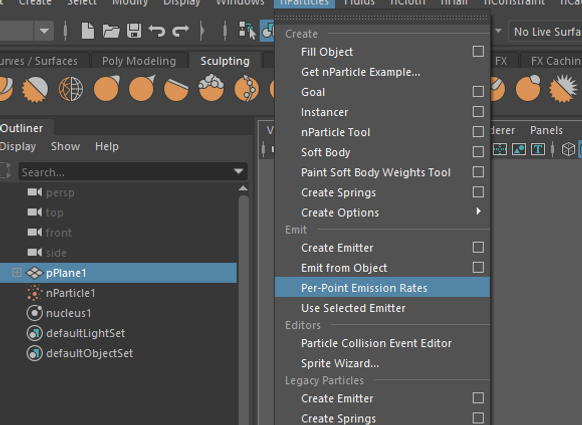
Added a per-point emission rates next.

Changed the rates around to get the effect i wanted.
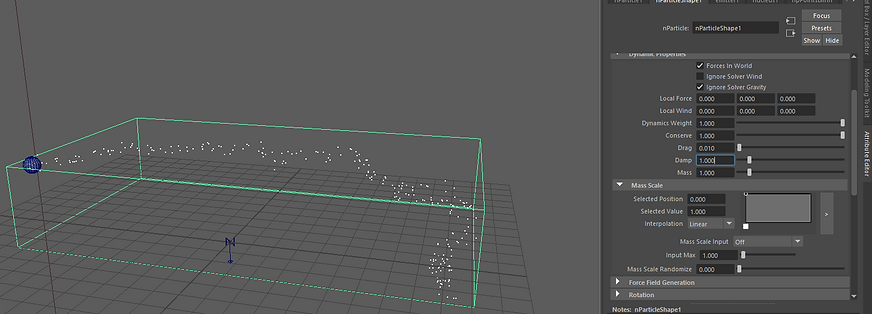
NPARTICLE

Here I played around the the lifespan of the particle.
Changed size.

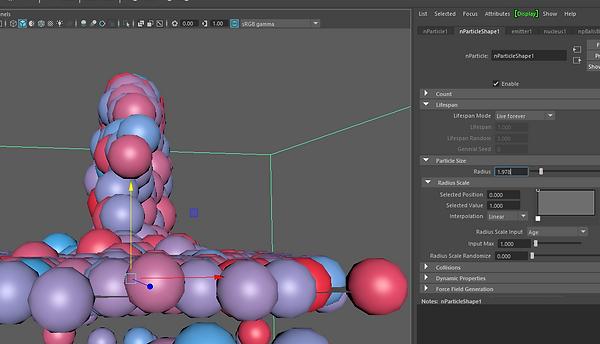
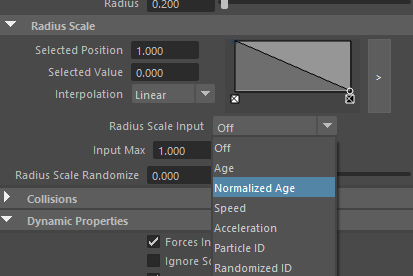
Used radius scale input and selected position to changed the particles sizes when I wanted.

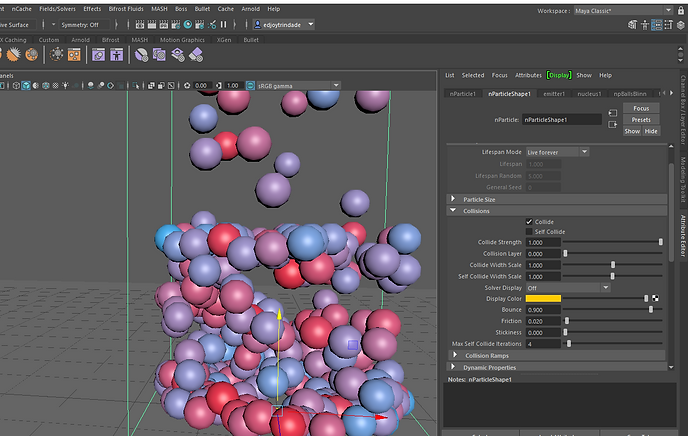
Self collider allows particles to collide with each other and the collide enables the particles to interact with an active object.

Here I changed with the scale of the collision thickness and self collision.
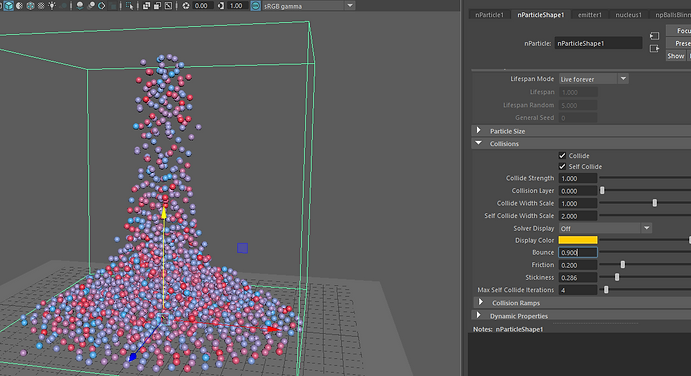
I increased and decreased the bounce, friction and stickiness of the particles to see the effect it had.

Changed the bounce scale.
NPARTICLE DYNAMICS

By turning on ignore solver gravity the particles stayed in the air.

I changed a few settings of the dynamics property to see the effects.
NPARTICLE ROTATION

I added a instancer to a cube, putting it under the particle.
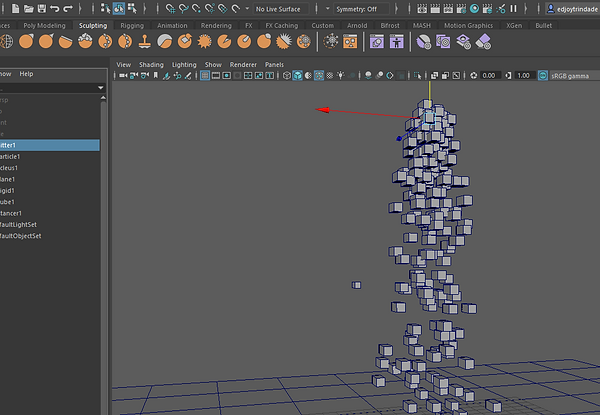
Result.

Enabled compute rotation.


Changed the rotation type to rotationPP.
Added volume.
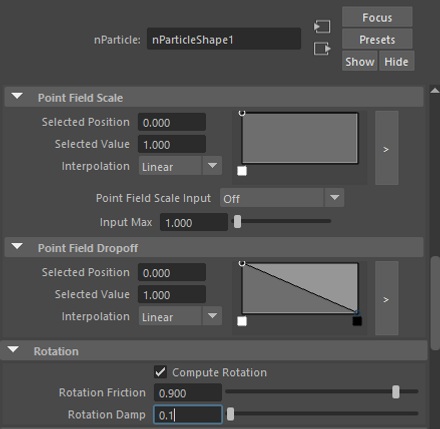
Changed the rotation damp to 0.1.
NPARTICLE RANDOM INSTANCES
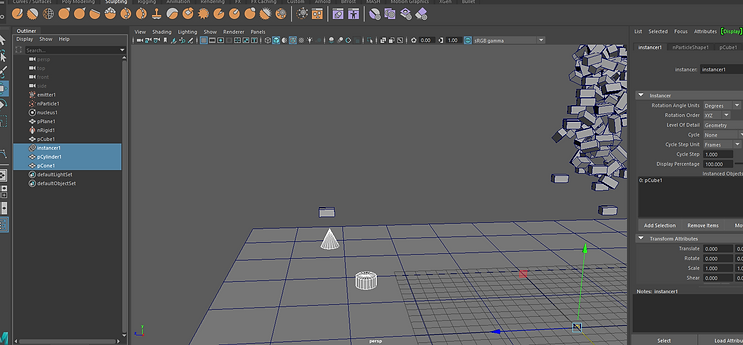

I created a cylinder and cone, selected both and the instancer and pressed on add selection.
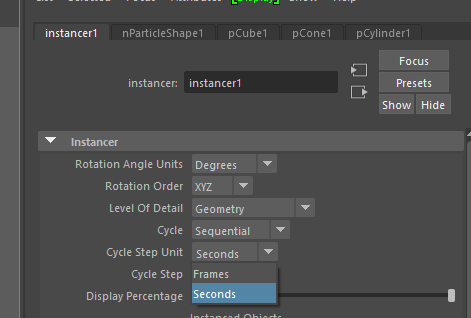
By changing the cycle to sequential and frames to seconds the cone and cylinder appear.


Changed the settings back.

Changed the object index to particle ID and the same effect happened.


Here I created an attribute.


Used the attribute to create an expression.

Result.
SHADING

I Changed a few settings on color and incandescence to try a few different shading effect.
Particles

I added a sphere, moved it and put it in a group.

Created a simple animation.

Made sure the default was set to points and added emit from object to the sphere.

Result.


I selected surface for emitter type and selected ignore gravity.


To have more control of direction I added volume axis

Put away from center to 0


Added some dump to suppress the particles.
Changed the Freq and detail.

Changed lifespan mode and range.

Changed the size.
Scale input and position.

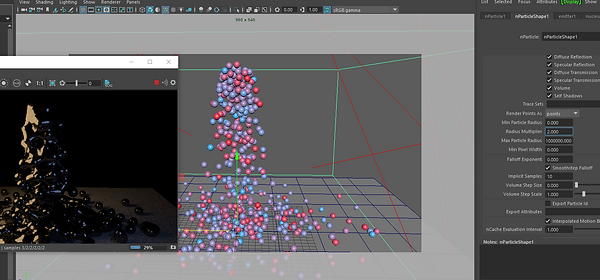
Played around with the render types.

Added some color.

Added a skydome light and put camera visibility to 0
Render 01

I created a emitter and added a light to the scene.

Added some exposure.

Duplicated the light, changed the colors and added more exposure to them.

Changed between emitter types. Here I selected the points.

Here I changed the radius with radius multiplier.

I went back to the sphere and put its diffuse down and all the color disappear.

Selected blobby surface again and changed its radius.
Render Color 02

I went back to spheres.

Changed multiplier.
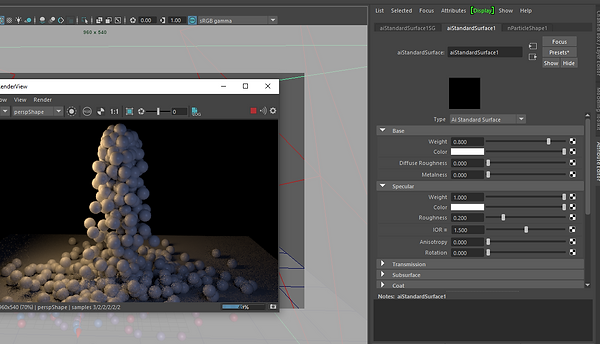
Added a surface shader to it.


Added a color.
The color was not rendered by arnold.
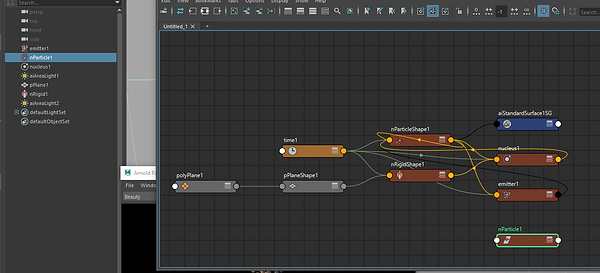
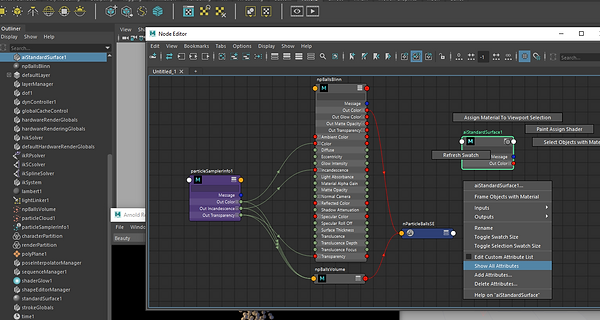
I imported the nparticles to see what was connected to it.
Disabled the DAG object only option.
Imported the particlesampleinfo.
Imported the surface shader and made it's attribute visible.
Connected the output color of the sampler to the base color of the surface shader and out transparency of sampleinfo to the opacity of surface shader.


Nothing happened until I turned off the opaque.
I also adjusted the position of opacity scale.


There was traces of shadows on the floor.

So I went to render settings and put the transparency up.

Added one color in the middle for some color variation.
PARTICLES TO MESH

Selected the particle and converted them into polygons.

Adjusted the mesh method to quad mesh.

Adjusted the threshold, scale and size of the mesh output.
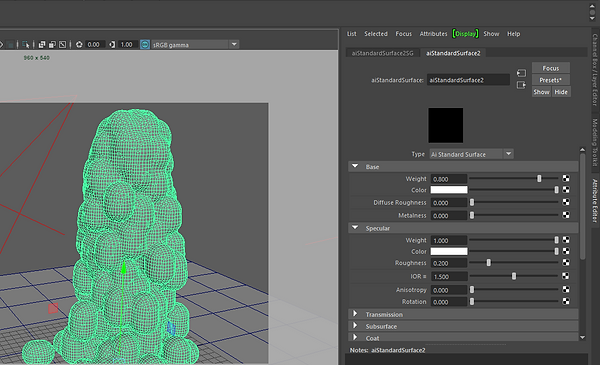
Added a standard surface to the mesh.

Activated color Per Vertex under output mesh.

And export vertex color under polysurface shape.

In the surface standard color I added a aiUserDataColor, found out what the mesh's color set name was and added it to the attribute.
Button to create shot.

The color then came through in the arnold render.
CACHE NPARTS

I cache the animation by selecting the poly mesh and creating new cache from nObject.
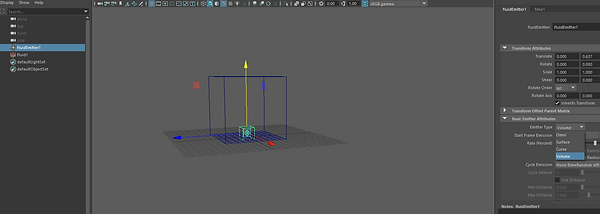
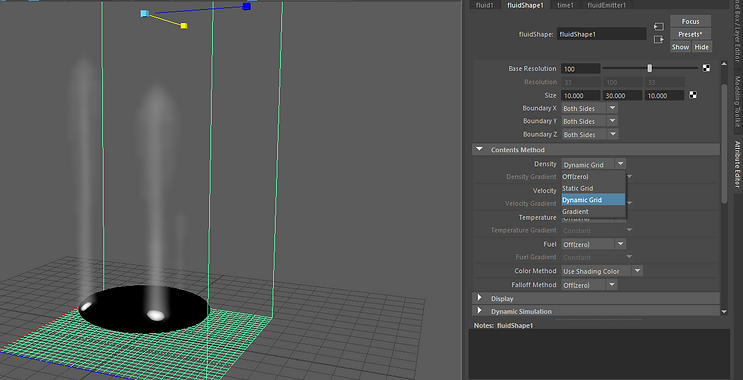
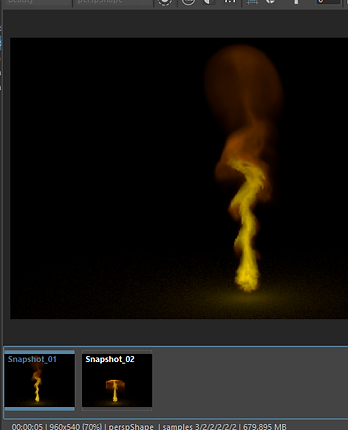
FLUID EMITTER ATTRIBUTES

Added a 2D container
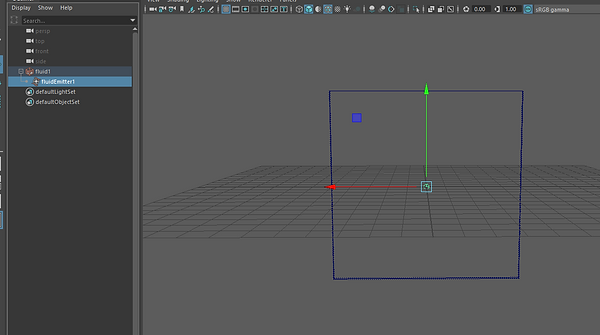
Ungrouped the fluid and emitter.
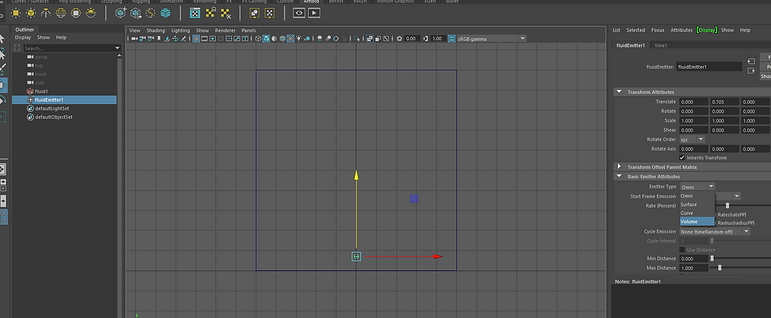
Changed the emitter type to volume.
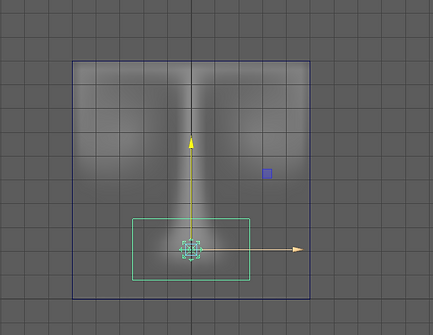
Result.
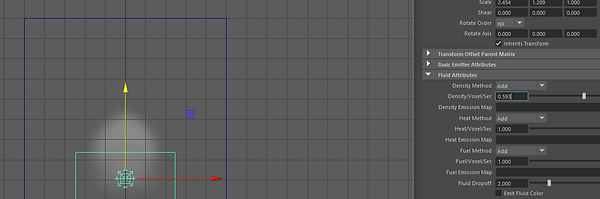
Played with the density.
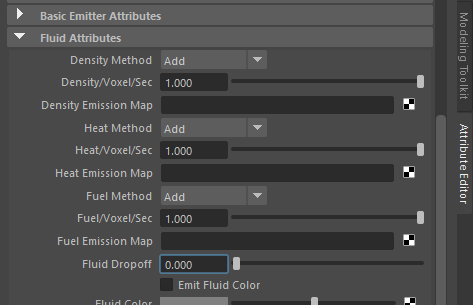
Adjusted a few fluid attributes to see the effects they had.

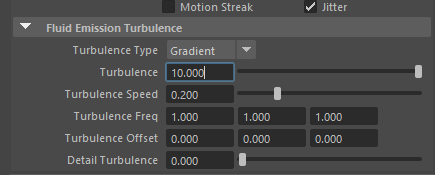
Added some turbulence.
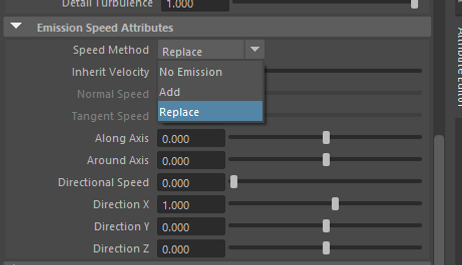
Changed the size of the space the fluid could interact and added a replace emission.

Put up the direction and speed of the emission.

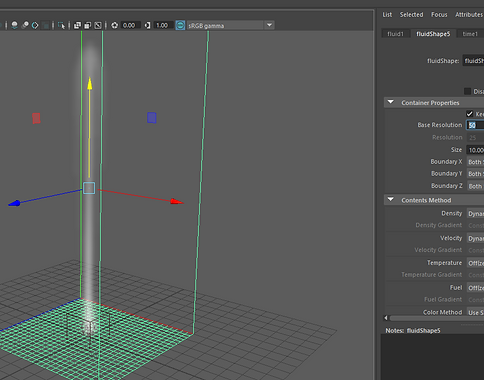
CONTAINER PROPERTIES

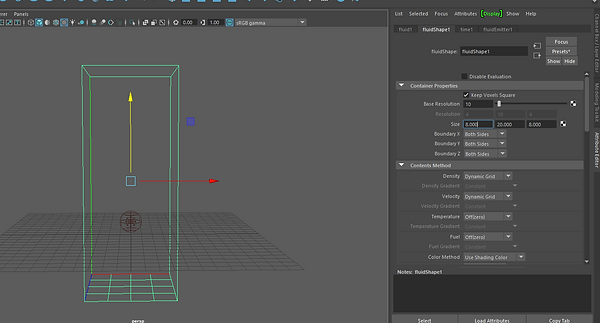
Created a 3D container, disabled parent to container.
Changed the emitter to volume.
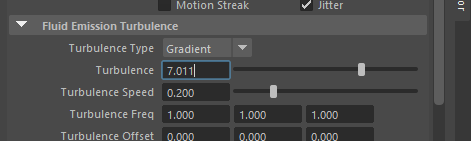
Added some turbulence.

Changed the size of the container

Played with the base resolution.
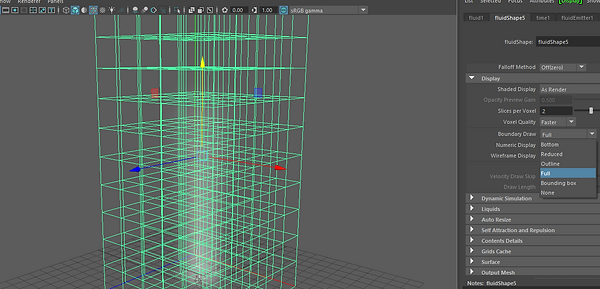
Changed the boundary draw under display.

Changed the settings on the Y property to see how the boundary would work.
CONTENT METHOD

Added a emit from object through the fluids options.

Added a surface shader.

Added a noise to the output color of the shader.
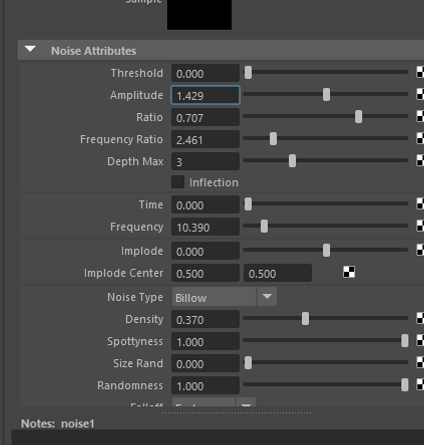
Changed a few settings for the noise.

Copied the name of the noise into the density emission map.

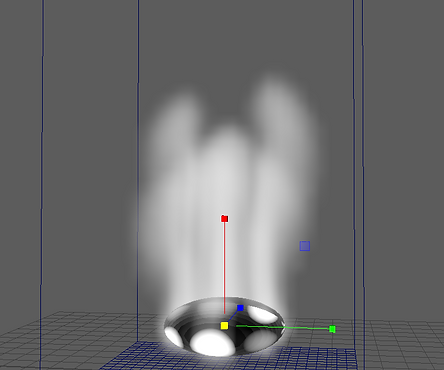
The smoke came through the white area instead of coming out of the whole sphere.
CONTENT METHOD
I changed the noise and played with the density of the fluidshape.

Changed the incandescence input,

changed the color.

Adjusted the transparency.

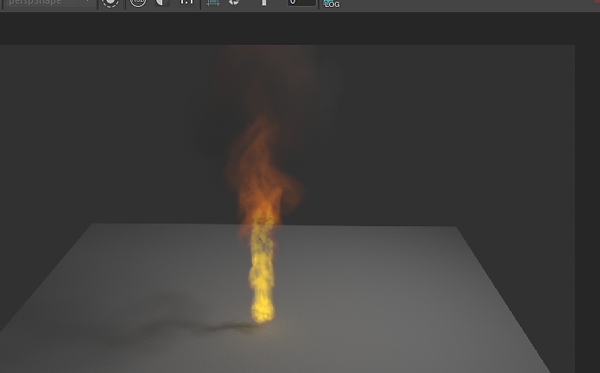
CONTENT DETAILS

Added a container and emitter

Changed the volume shape to sphere.

Put down the fluid dropoff.
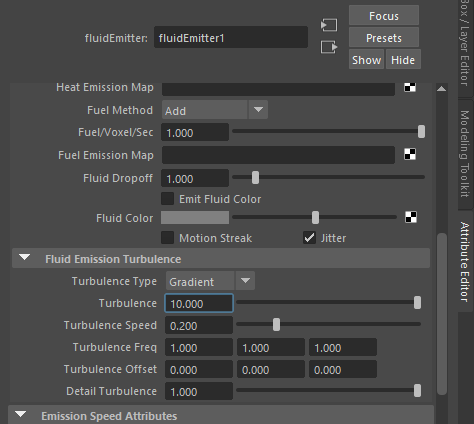
Added some turbulence.

Changed the color input.
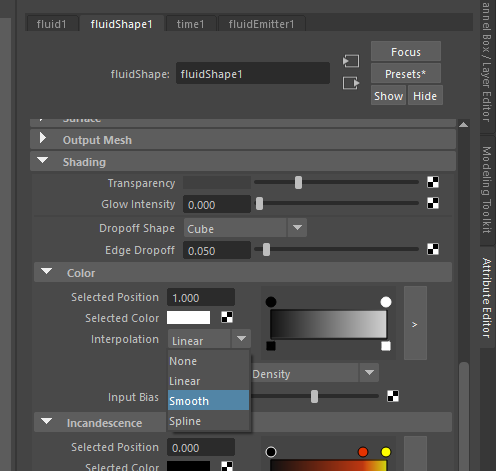
added some black and changed interpolation to smooth.

Changed the content method for fuel and temperature and scaled the container.


Adjusted density.

Changed the input bias and the incandescence input.

Changed the incandescence back and forward between the temperature fuel and density to see how everything was behaving.
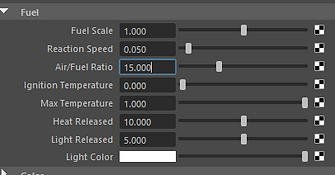

Changed the settings for fuel and temperature to get the effect I wanted.
Button to create shot.

Result.
TURBULANCE NOISE

Added more turbulence to the fluid.

Changed velocity and noise.

Added some strength, frequency and speed for the turbulence under the container.
AUTO RESIZE ISSUES
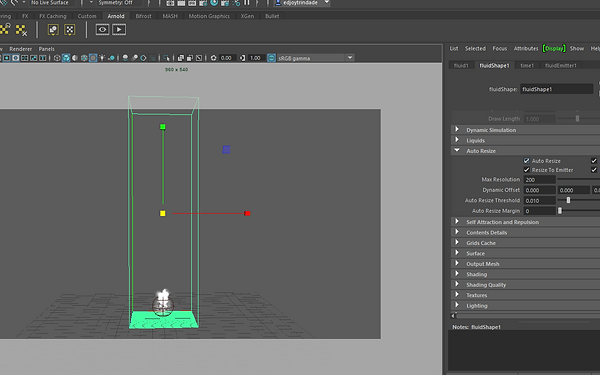
I activated the auto resize.
This is the picture without resizing.

This is the one with auto resize on.

I changed the auto resize to 5 and that was the result I got.


I added a emitter to the fluid, put the rate percent to 0 and animated the box to go up as the fire emerges.

Result.
Shading

I added a area light, position it and put the exposure up.

I added a skydome, put the exposure to -5.

Changed the input bias on the incandescent.
This was before I put the input bias down added.
INTRO TO CAM RIG
Added a cube to a particle instancer.

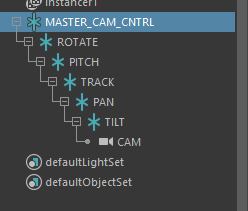
Created a camera added a few locators, parented and named them.

After locking the camera and attributes that I was not going to use.
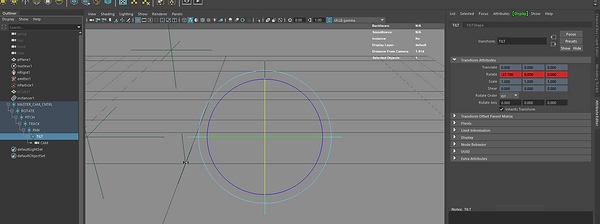
I keyframed the positions to create the motion the camera will follow.

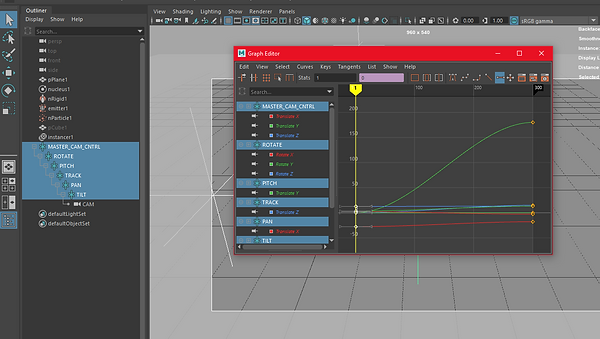
I added a linear to the first keyframes so the motion would ease in from the start.
PHYSICAL SKY AND SKYDOME

In this session, we looked at a few settings inside the physical sky and skydome lights.
How to properly import and convert texture.
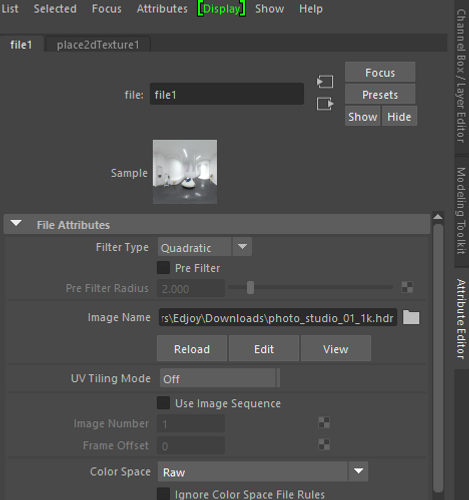
Importing HDR

Adding the resolution and enabling the alpha by putting the camera to 0.
STUDIO LIGHTING - AI STANDARD SURFACE BASICS

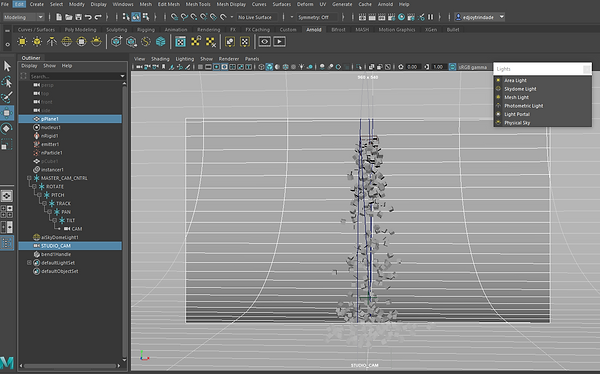
In this session, we looked at how to create a simple studio setup. I added some area lights, an HDRI file and adjusted a few light settings to get different effects.
We also looked at what some of the settings on the ai standard surface are used for.
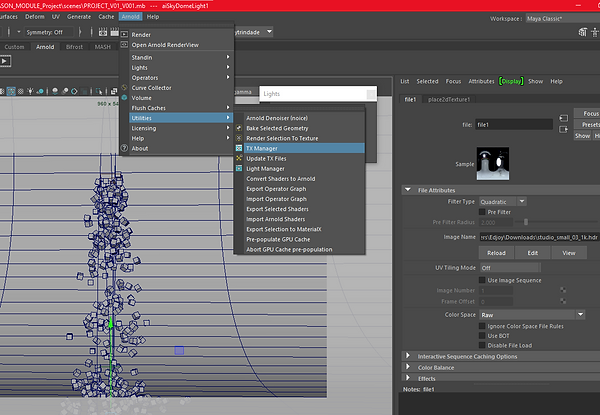
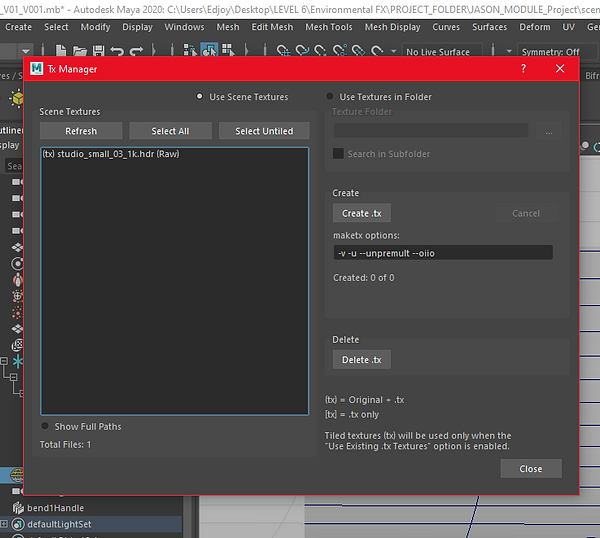
Here I converted my image type to a tx file.
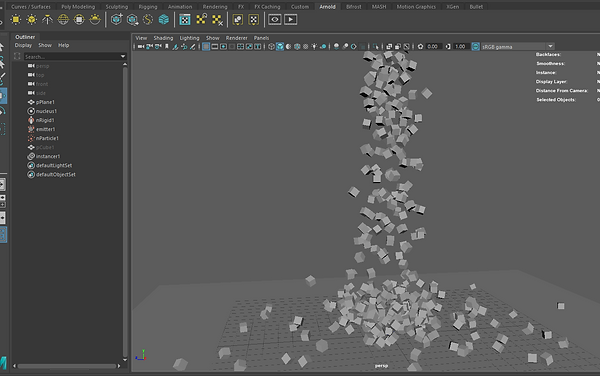
Destruction nCloth and nParticles

I added a rigid body and changed the shape type to sphere and body type to kinematic.


I also added a kinematic rigid body to the legos.


After many tries, I come across many issues.
The only way to get something close to the footage was to add a kinematic body instead of a dynamic rigid body.
A key was added for the kinematic body type on the first frame, 2 before the balls impact and one frame before the impact I keyed the dynamic body type.
I animated the ball and changed from kinematics body to dynamic after they were keyframed before the impact with the legos.
I also changed the Y gravity and frame rate.
Asse2
Fantasy
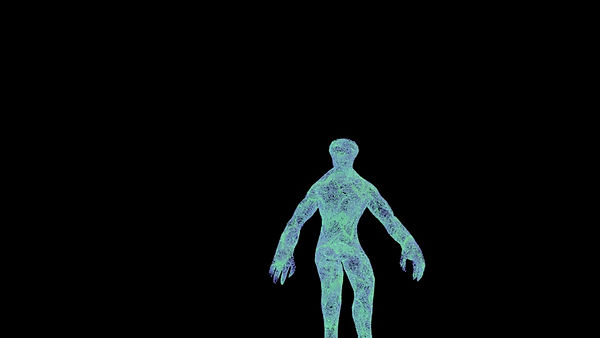
Walking alien with particles

Surreal
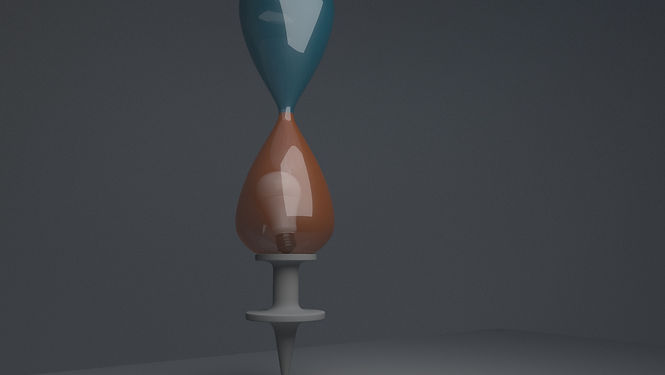
Hourglass on top of pin and lamp bolt inside an hourglass.
Natural
Cloud


bottom of page